
Hello, friends! I’m Elizabeth, the owner of Stockroom Vintage, a Nashville vintage event rental + styling business. I’m so excited and honored to be posting on Little Chief Honeybee because, as you know, Kaelah is amazing—getting to collaborate with super talented, genuine and sweet ladies is really the most rewarding aspect of what I do with Stockroom Vintage. Well, that and having a legitimate reason to be an obsessive thrift shopper and vintage inventory hoarder. That’s also pretty swell!
When Kaelah asked me to share a wedding DIY with all of you, I immediately began dreaming up ways I could repurpose this pretty little 99-cent teacup I saved from a pile at the flea market. It’s a little chipped and worse for the wear, but there’s beauty in that, right? (I’m a smidge, okay a lot, obsessed with heirloom china. I’ve collected almost 500 vintage dinner plates to add to my rental collection. See? Obsessive.)
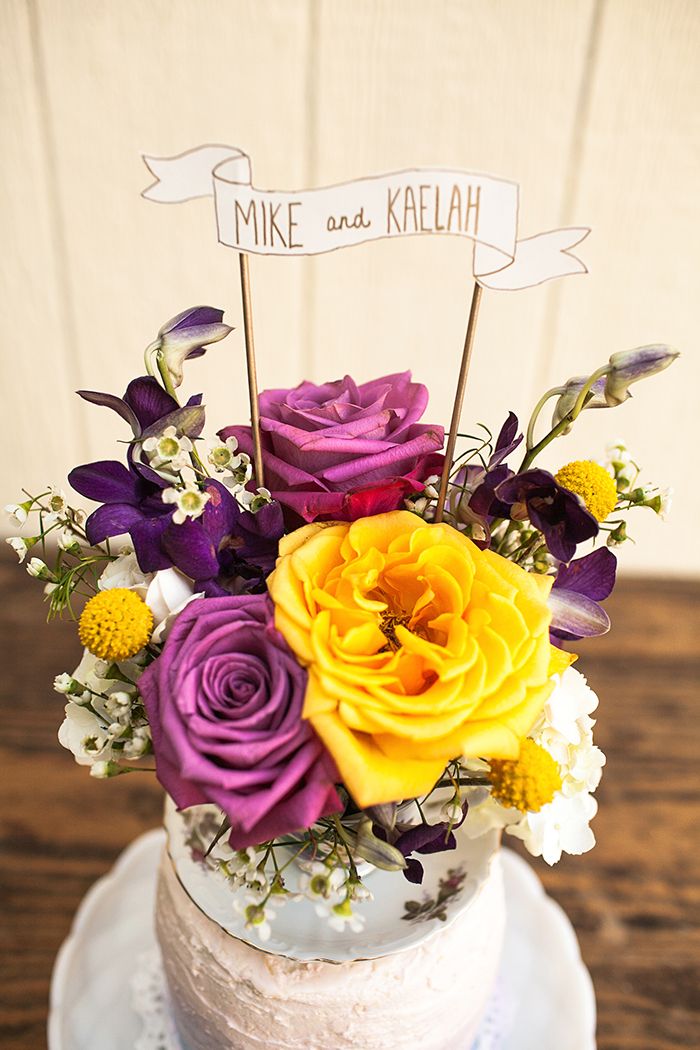
I thought this teacup deserved to be center stage, and what better way to do so than by filling it with blooms and placing it atop a wedding cake? Hence the vintage teacup cake topper DIY was born. Once you’ve rescued your teacup from the thrift store shelves or nabbed one from your grandma’s collection, you can use the piece’s pretty color palette to guide your flower choices moving forward.
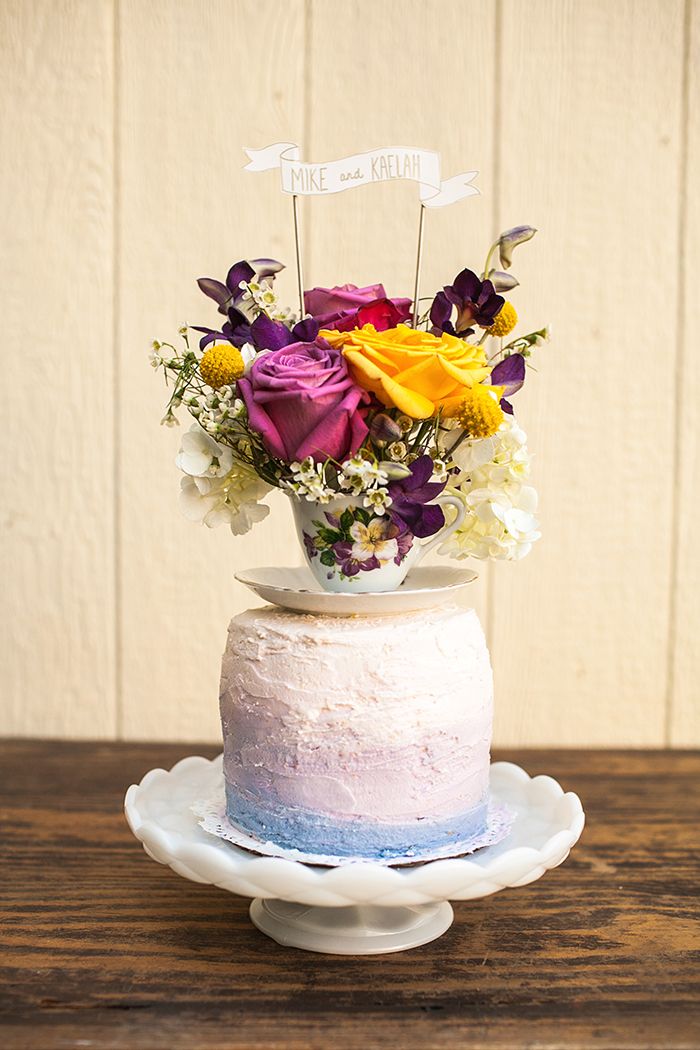
I opted to bring out the teacup’s purple hues with an ombré icing design, which was created by Jenna of Kitty Cat Stevens. You can find her recipe for this yummy lemon- blueberry cake with blueberry jam and lemon butter cream icing here. And, yeah, it tastes as delicious as it sounds.
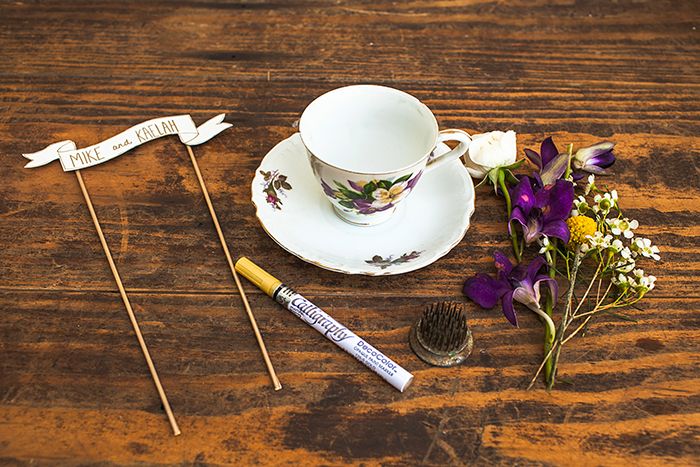
Here’s what you’ll need:
- vintage teacup + saucer (matching isn’t required—I mixed mine)
- flowers
- floral foam or antique flower frog (which I used because I bought the wrong floral foam!)
- cardstock for banner
- two wooden skewers
- scissors
- glue dots
- pen
Directions:
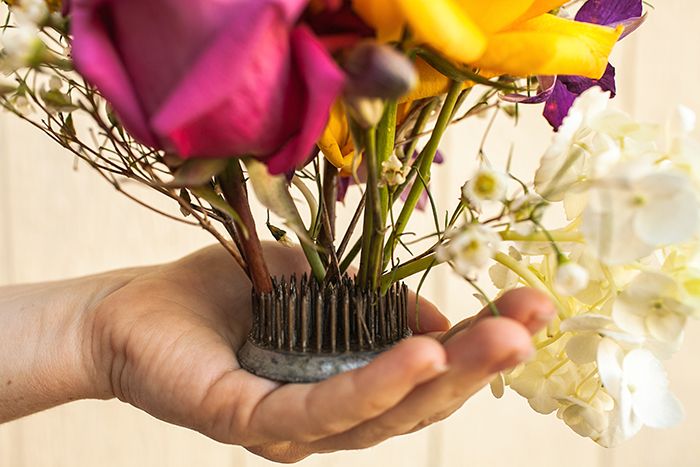
1. Soak floral foam in a bowl of water then trim it to fit snugly inside your teacup. (This handy guide explains how.) Or, if you happen to have a little floral foam mishap like me, you can always use an antique flower frog to hold the arrangement in place.
2. Arrange flowers in the teacup, starting with larger blooms in the middle and working your way outward, pressing the cut stems into the foam or flower frog. If you get some resistance or are afraid to break the stems, you can always poke holes in the foam before inserting flowers. (P.S. I got these pretty flowers from Hillary Yeager at Brocade Designs, a real Nashville gem!)
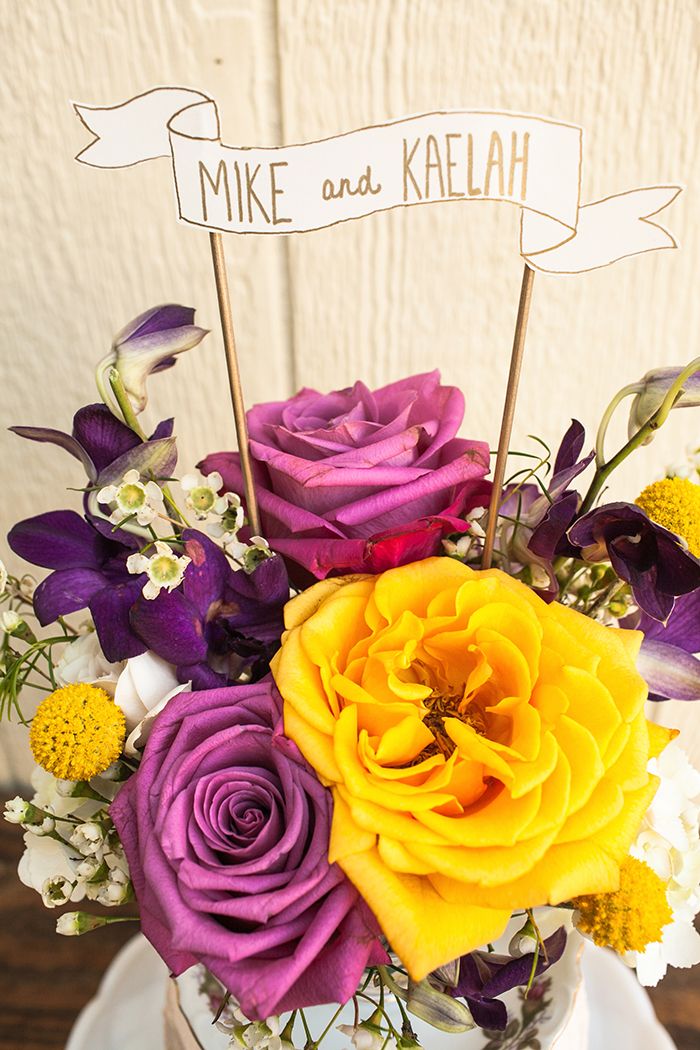
3. Cut cardstock into the shape of your choosing. I went for a simple banner, but a flag or bunting design would also be lovely. Add the names of the bride + groom or whichever sweet saying you prefer. I used a gold calligraphy pen for a shimmery pop of color.
4. Attach banner to the wooden skewers with glue dots. (I painted my skewers gold beforehand.) Gently insert skewers into your flower arrangement.
5. Place teacup and saucer atop your cake, pressing the saucer gently into the icing and working it downward for extra stability. Then admire your crafty amazingness!
So there you have it—a simple and affordable DIY wedding cake topper. If you create a teacup cake topper of your very own, I’d love to see your handy work. Please share any creations with me via Twitter or Facebook. Thanks again to Kaelah for having me!
Photos: Stef Atkinson
Flowers: Brocade Designs
Cake: Jenna Puckett
Styling + Design: Stockroom Vintage
♥ ♥ ♥ ♥ ♥ ♥ ♥ ♥ ♥ ♥ ♥ ♥ ♥ ♥ ♥ ♥ ♥
I'm pretty sure this is the cutest thing that has ever been. Makes me wish we had a way to put it on top of our pies! ;) Looks like I'm going to need to throw a big party so I can do this, yes? Wanna come? Huge thanks to Elizabeth and her fab team for this awesome guest post. I love repping the Nashville creatives that I'm surrounded by! I'm going to also have to pester Jenna to make this cake so I can just sample it.. and by sample I mean eat all of it!


It's so lovely :) x
ReplyDeleteBeautiful!
ReplyDeleteThis is breathtaking! What a pretty (and simple... and cheap...) design to incorporate into a wedding, or any party. I adore this, thank you so much for the tutorial ladies! :]
ReplyDeleteXo,
♥ Emily
teatreevintage.blogspot.com
this is so cute! i can see it as just a sweet little house decoration as well. xx
ReplyDeleteWow your cake was amazing.
ReplyDeleteWhat a beautiful idea. And that cake looks delicious. :)
ReplyDelete-Lindsey
This is lovely! And I love the ombre frosting. :)
ReplyDeletethat is so cute! great idea for a party :)
ReplyDeletexo, cheyenne
Wow! That cake topper is gorgeous! It actually looks like something I could possibly pull off. Thanks for the tutorial!
ReplyDeleteHow sweet <3
ReplyDeleteThat cake looks yummy! I need to eat Jenna's stuff!
ReplyDeleteIt's so lovely! What a fantastic idea!
ReplyDeletexoxo Sarah
theantiquepearl.blogspot.com
Usually whenever I see DIYS, I've always seen something at least a little bit similar, but never anything as clever as this! Thank you!!
ReplyDeleteWOW! It looks so beautiful! I'm going to keep my eyes open for old tea cups now and do this! Thanks for the project :)
ReplyDeleteThe colours are so bold and cheerful yet stylish and tasty! Loved the idea! Thanks a lot for sharing Elizabeth ^^ xx
ReplyDeleteI love the way this looks! So whimsical and cute in the teacup!!
ReplyDeleteAwww...thanks for all of the kind comments! And for those of you wondering about Jenna's cake...it was crazy delicious. It was all I could do not to eat my extra slice for breakfast. Lemon blueberry goodness, I tell you. :)
ReplyDeleteThis is beautiful, I love it! Great idea.
ReplyDeleteI love this! Might have to recreate with faux flowers so it can be around forever ;)
ReplyDeleteThis is wonderful. I really like the teacup.
ReplyDeleteoh my heart! i am in LOVE with this idea! so sweet!
ReplyDeleteGorgeous! x
ReplyDeletecutest! EVER! i love thissss it's so creative and beautiful
ReplyDelete<3 katherine
of corgis and cocktails